
Binning [Google] Authenticator
Connecting devices, especially iPhones, to your PC, can be a hastle—especially since Apple pushed the connector that doesn’t have a usb front. Therefore, we will look at a wireless alternative to transfer files/documents between the PC and iPhone.
Most options on the app store are awful… in every regard. They give you a trash version and push you to purchase a subscription based premium version, otherwise you basically get limited (entirely useless) functionality. Also you don’t know what type of data they connect, which can be worrying if you were to give them access to photo library or files.
The best way to do this is to use kdeconnect—free software, available on both app store and Linux.
Installing kdeconnect on Arch Linux:
sudo pacman -S kdeconnect
On your phone, go to your photos, and find the QR code(s). Save it to files by clicking the option on the bottom left which will bring up the menu for it.
Open the app on your phone. On your pc, navigate to ‘kdeconnect-settings’—via terminal, or an application launcher like rofi/dmenu.
Pair your PC and phone via kdeconnect.

If done correctly, you’ll see your PC’s name under connected devices (on the app), and vice versa.
On the phone, click on your PC’s name and select Send Files.
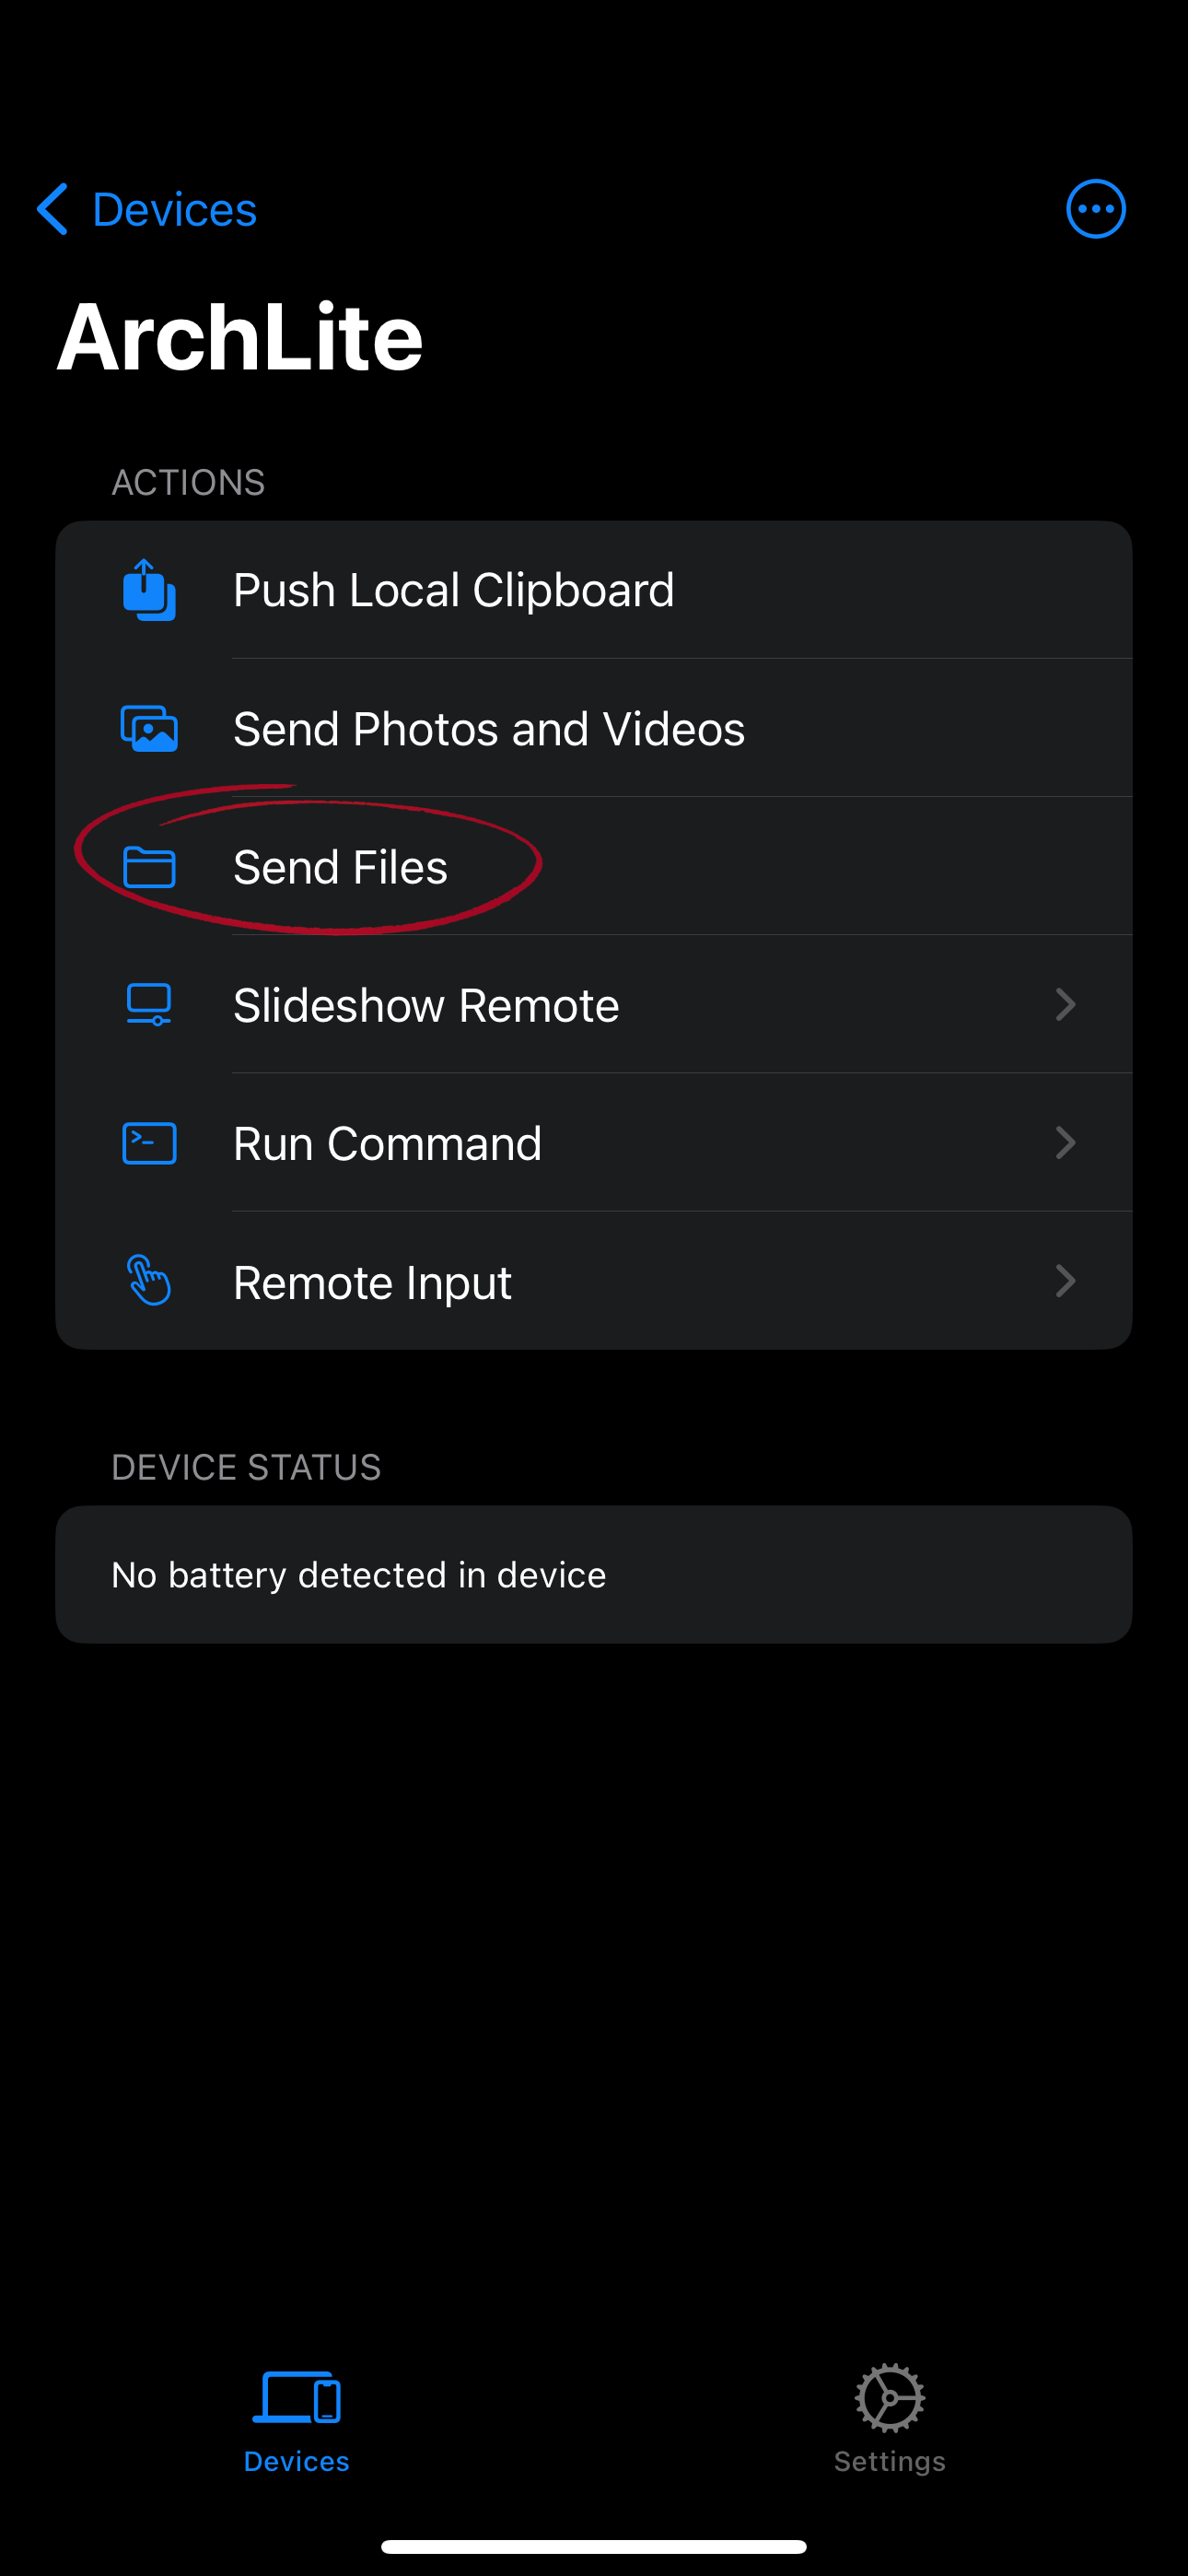
Select the QR code we saved in files.
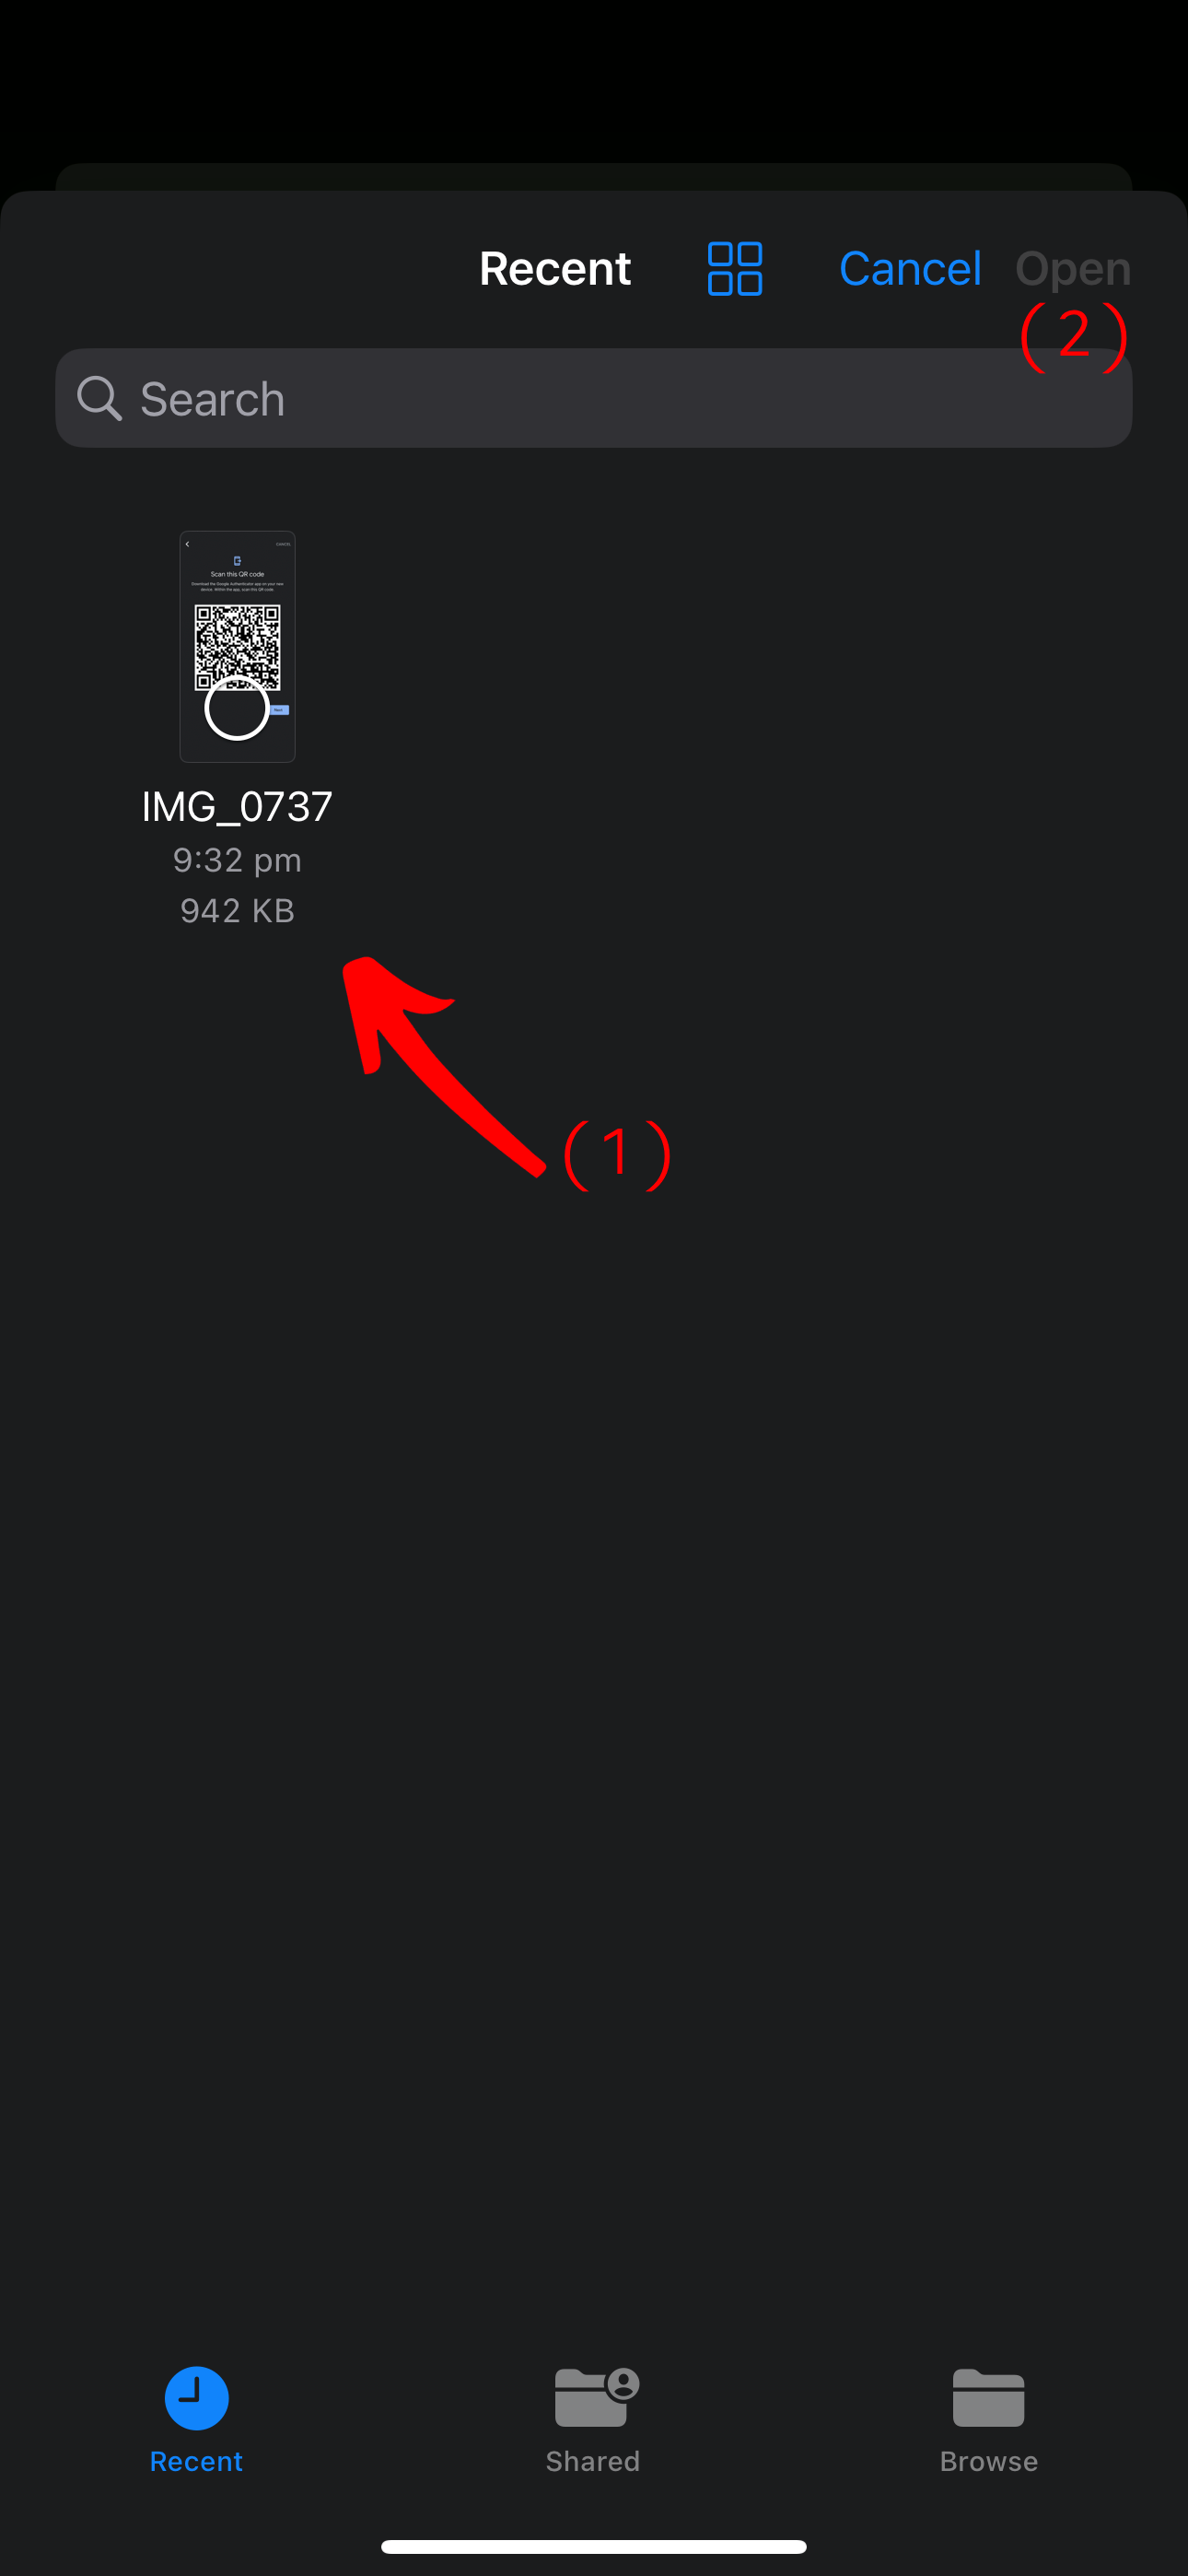
This will be saved in your downloads folder by default (~/Downloads).
Why do we need to transfer files between the two?
We will need to transfer the screenshot of the QR code generated by your current authenticator service (whether it be Google, MS, etc.).
Next we’ll need a program that can extract the OPT secrets from QR codes. For this we’ll be using scito/extract_otp_secrets:
git clone --depth 1 https://github.com/scito/extract_otp_secrets.git
Running the script:
cd extract_otp_secrets
pip install -U -r requirements.txt

python src/extract_otp_secrets.py /path/to/qr-code.png >> accounts.txt
This will decode and save the accounts’ information to the .txt file.
The unfortunate part about this is that we will need to enter each account manually into Raivo.
Why do need to QR code parser?
The QR code generated by Google Authenticator isn’t a valid code for Raivo, therefore you need a parser to read the QR-code and decode it.
Open your Raivo app (if it’s your first time, you’ll need to go through the [trivial] setup). Click on the + sign on the top right.
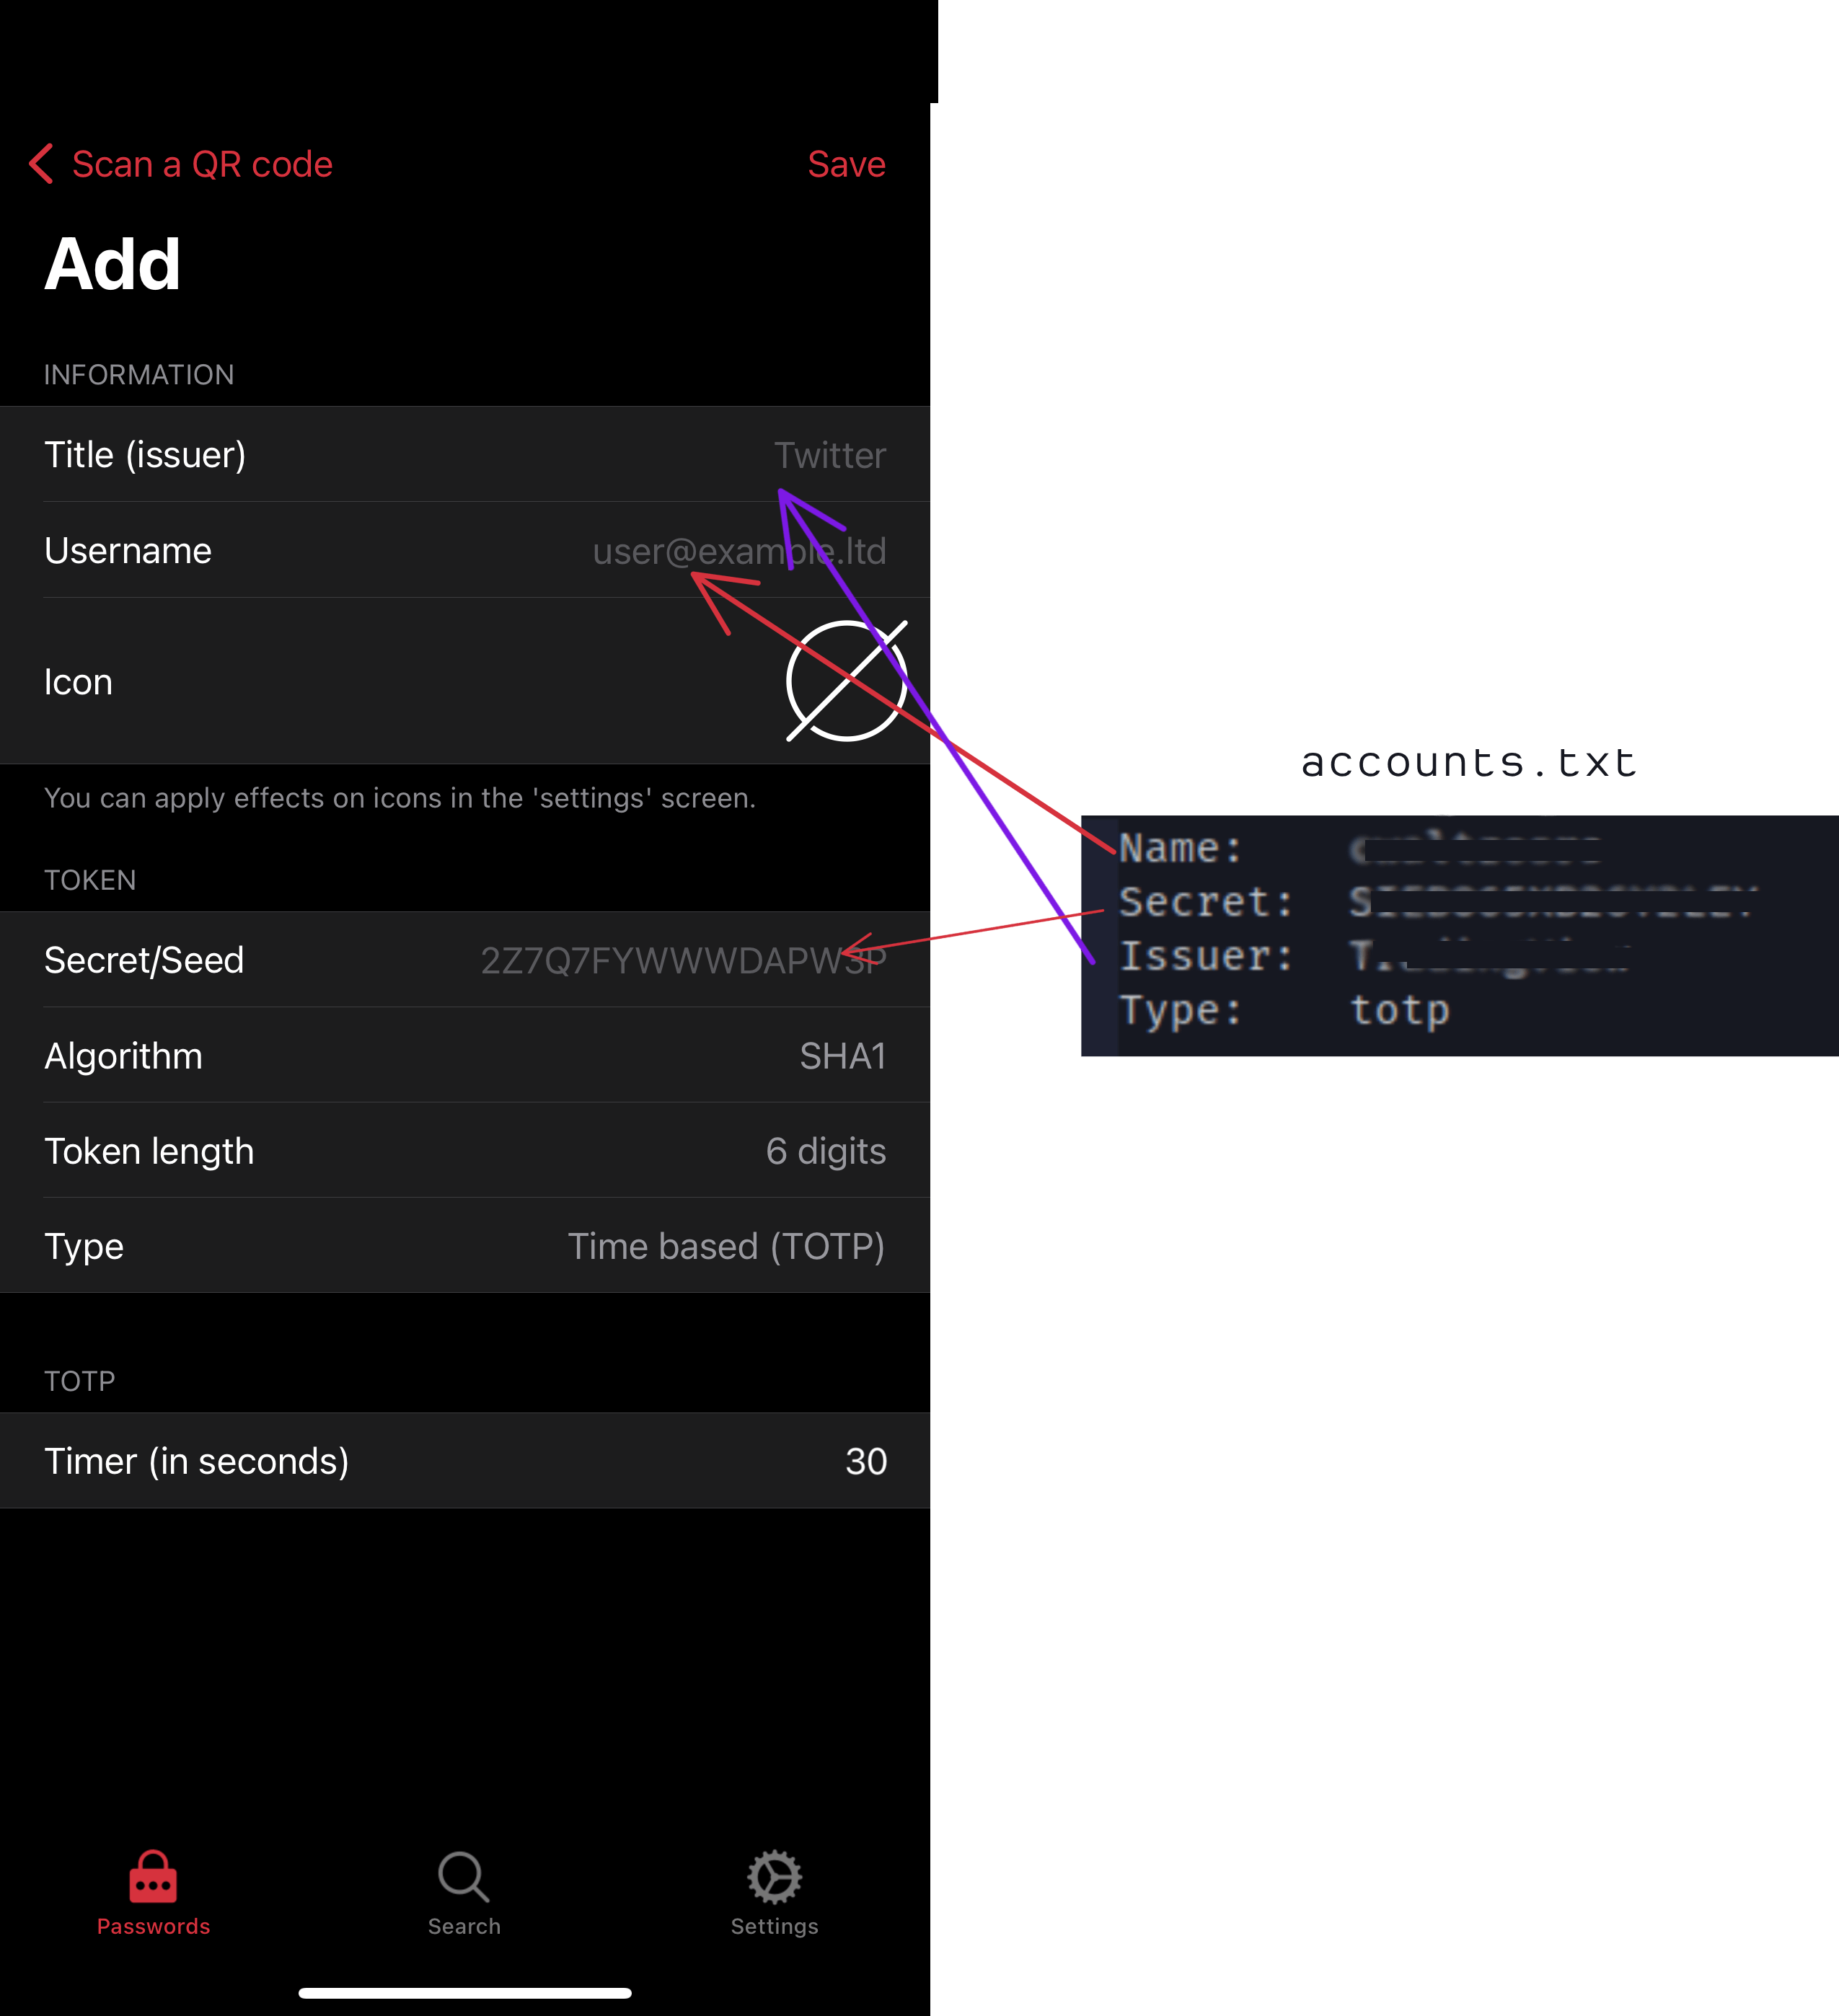
The Icon is optional. Rest stays the same; and click save on top right to add the entry.